Monday 26 December 2016

Final Colour Theory Concertinas

For my final layout I decided to make three concertinas, each with a serrated edge so that had the potential to be torn. Because there was restrictions on printing I decided to make each centre element of the postcard separately and stick it down with raised pads. Then on the back I used corner holders to keep the information in place- to give it a classic and layered appearance. Of course this made each concertina thick and raised, so it was difficult to lay them flat.


For this I decided to create an elastic strap, in order to make it feel like a pack or collection wrapped together. However the strap was too loose, this could have been more effective if I had included a button or some form of attachment that would fasten it closed.

 I also wanted to add layers of punched shapes in the concertinas, so they could work layered on top of each other, as well as individual postcards. For example on the front facing postcard I made sure the cut out squares would show small elements of my Otl Aicher inspired design. But cut out squares also meant that light could be shone through the holes, adding another component to the concertinas. As show below, I also raised squares that would fit through the punched holes, so they could appear on the front design and that behind it. People love to interact with elements like this, it derives from childhood to want to connect things together- so I thought including it would mean there was more involvement from the viewer in the information. 


In my overviews of designers involved in colour theory, I decided to do illustrations inspired by Milton Glaser's Bob Dylan album design. Each had wild, colourful strands of hair, just using the colours from the pantone. This meant that in doing my research I felt I could connect more with who the designer was and not just what they theorised. I also thought it would be a good way to use the colours in the context of a real design, as a pallet for clothes and hair.


Otl Aicher Inspiration

Whilst doing some research I found a piece by Otl Aicher called Herbst 83', this piece involved layers of coloured strips used to indicate a landscape scene. I liked how the use of inverting colour and ordering them a certain way could create a composition.


So I experimented with the colours I'd collected from my pantone in layering them to create a scene. The colours of the scene are almost more important that the from, as they suggest a mood and an indication of layers withing the scene.

Friday 23 December 2016

Concertina Example

In order to make my colour booklet into a concertina I looked at this Unit Additions set of postcards. Each one has a bold outline which frames the stamp in the centre nicely. There is a consistent layout for each and a consistent style of illustration- I hope to have consistency of colour running though my designs. Each one is black on the back, presumably for an individual message- I hope that for my own work I will be able to write about each postcard design on the backs.
To make this concertina Unit Additions have printed on an A2 page and split half the page into 6 separate designs, to make my own I will do three sets of 4 postcard collections (printed on A3.)

'Colour Plan' Influence

In order to create my own colour booklet I looked at several examples. One which was particularly influential was this catalogue by 'Colour Plan.' Part of it's design was that it had shapes glued on to make them stand out- I decided I also wanted to create cut outs of certain colours to present my swatch. The fact it extends outwardly makes it feel rich with content, and organised with it's layout- this lead me to want to have a fold out brochure myself. However I thought it would be interesting to create something that folded out, but then had the potential to be torn into individual postcards that can be taken away and distributed.

Thursday 22 December 2016

Thornton Arcade Colour Swatch

Creating a colour swatch for Thornton Arcade has meant that I had a consistent colour pallet to use for this project. By using the colours from a photographed scene it means that the light and setting are already quite complimentary, therefore creating a nice pallet to use.
It was interesting to experiment with the different colour combinations which are presented in my colour booklet. I realised that any two colours could work well together, depending on the aesthetic you were trying to achieve.

Colour Theory

Overall colour is used to communicate a feeling, conjure associations and offer directions in ways images sometimes struggle to. Graphic design was once only seen in black and white which has been argued as “restricted” and “unfinished.” However black and white are integral in most communication and if used correctly can indicate colour by their usage. Yet with the progression of printing processes colour is now an integrated component of our communication with each other.

The colour wheel was formed in 1965 when Sir Isaac Newton discovered prisms separate light into a spectrum of colour- red, orange, yellow, green, blue, indigo and violet. He then arranged them in a wheel to understand their relationship with each other. Analogus colours are hues that sit next to each other on the colour wheel and are usually harmonious and complementary. Whereas Complementary hues are ones opposite each other on the colours wheel, they usually contain no element of each other and are opposing temperatures. These often work well together in contrast and bold styles.

Johannes Itten developed strategies as a teacher in the Bauhaus 1919 to format strategies for successful colour combinations. He created seven methodologies for coordinating colours using hue's contrasting properties. These involved contrast in saturation, light and dark, extension, complements, hue, primaries, warm and cold. This are rules that can be used to create different types of form that will have bold and exciting appearances, without having to go through such a rigorous trial and error. He also developed the 12-hue colour circle, which outlines primary, secondary and tertiary colours showing the original colour and the different combinations it can make moving around it.

Some of the attributes for colour ranges include the changing of shade (adding black to the hue,) tint (adding the addition of white) and saturation (the hues purity as it neutralises to grey.) Despite the multitude of colours we have available to us, designers often use a very select few colours. Colour is often used very systematically in design, pallets are found through libraries of swatches. These are usually black, white and one or two other colours. This is to create a strong and bold foundation for communication. A design can be far more comprehensive with a limited pallet.

Graphic design is about the construction of form and composition. Part of this is the subjectivity of colour and how we can use it to reflect or distort reality. We only see colour when light bounces off objects or comes directly from a source and enters the eye. This is hard to comprehend as it feels as if colour should exist as we exist. When in darkness we are still as vibrant and complex as we are within light, whereas colour ceases to be.

Our use of colour is constantly shifting in our cultures and our history. It evolves alongside our perception of society, as a collective and as individuals expanding our own knowledge.

CMYK vs RGB

CMYK- Cyan, Magenta, Yellow and Key (Black.)
RGB- Red, Green and Blue

The RGB colour mode uses red, green and blue and is able to combine these to create most other colours using an 'additive' method. This mode is usually used for computer monitors, LED televisions and digital cameras. Programs like Photoshop also use RGB as it can achieve a multitude of colour variations.
CMYK on the other hand is becoming more of an uncommon mode, however it is mostly used for printing. It uses cyan, magenta, yellow and black in a layering method, with the exception that offset printers can use a “spot” colour which can be used to make a specific colour swatch, usually a Pantone colour. If you were to add all the CMYK colours together it would become darker, whereas with the RGB mode in varying amounts you'll end up with white. 


Pantone

The Pantone Matching System (PMS) began as a printing company in New York in the 50s, however now it is a collection of industries primarily invested in printing. They largely specialise in paper printing but sometimes they will also use coloured fabric and plastics. Pantone’s main product output are Pantone Guides, which are large amounts of cardboard sheets painted with related colour swatches to create a “fan deck.” This enables specific colours to be found by using a “colour match” during the production stage, which means a consistency is maintained between designer, manufacturer, retailer and customer.


International Klein Blue

International Klein Blue (IKB) is a deep ultramarine hue created by Yves Klein, a French painter. Klein considered this electric colour to be immaterial, almost beyond what we can see or touch; ‘space-like.’ He achieved this by mixing industrial blue paint with a highly volatile fixative- giving the tone depth and a sense of suspension. Klein was passionate about representing his colour through using movement and performance art and he is known to have described the body as a “living paintbrush.” He is known for painting models' naked bodies and asking them to walk, roll and sprawl on to blank canvases. This showed an energy and exhilaration that parallel with the vibrant colour itself. It has been said that the colour can only be fully appreciated in person and cannot be reproduced on screens or in print. However, Klein registered the colour in 1957 and it has been used widely since then.

Examples:

Novi
Bureau Progressiv- Germany 2013

This use of Klein Blue works well as it is juxtaposed by the vibrancy of red in the controller. Usually Klein Blue is paired with pale blues and whites, however this combination serves power and electricity. It helps to communicate the powerful message made in implementing guns into the controller. It feels as if the blue has been purposefully chosen to look artificial, as violent games are sometimes considered “unnatural.”

Tourismusplakat Hoch-Ybrig Poster
Kasper Florio- Switzerland 2015

The use of Klein Blue in this piece pulls the design from the page, it's strong pigment means that anything next to it feels as if it falls behind in shadow. The use of a matte green works well next to such a fluorescent colour, and doesn't feel conflicting. This makes me consider that in some cases Klein Blue can be considered natural and create a fresh and clear effect. 


Small Wave-Edition Journals
Oliver Hischier- Switzerland 2015

Klein Blue has been used in sharp contrast with white here, using slits of colour to create a hectic effect. The repetitive angular shapes create quite a contemporary design. The bright colour and fluid patterns draw parallels with the ocean or reflections on water. Klein Blue seems to be more commonly used for straight edge design, rather than organic shapes- perhaps it would seem overpowering on natural forms.

Surfing in Waikiki
Johan Chaneac- France 2016

The classic Klein Blue colour is less prevalent here, however the colours feel as if they derive from Klein Blue as a collective. They still maintain it's vibrancy and the layered texture of the book creates a deep and bold impression. The overlaying of these three blues feels airy and natural, the sweeping colours remind me of the sea and sky in a landscape. Solely using blues in a composition feels very tranquil in works like this.

Josef Albers

Joesph Albers entered the Bauhaus in 1920 aged 32, this was the beginning of his career in colour.
Homage to the square was his most signature series, encompassing over 1000 related works, which Albers began in 1949 and continued to develop until his death in 1976. He chose the square because it's a single, repeated geometric shape, which he theorised was devoid of symbolism. This meant he could systematically and freely experiment with colour relativity and the relationship different colours have with each other. Including juxtaposition, placement, attraction and resistance and finally movement. Different pallets can create different climates and a selection of just three colours combined can show individual moods and associations, different for every viewer. He worked passionately on a range of optical and psychological effects that colour can create, depending on their position and proximity with each other. In fact he even suggested that colour, rather than form, is the primary medium of pictorial language. Albers's 1963 book Interaction of Color provided the most all-encompassing analysis of the function and perception of colour to date.

Monday 19 December 2016

Documentation of Leeds

One of the main things I want to focus on is the deterioration of signs and how long they maintain meaning. The bicycle sign has half disintegrated yet it still is discernible, objectively this means it is less effective, yet subjectively does it give it more of a story. Because it is in paint it commands more authority, whereas the graffiti by the bollard can be easily ignored despite its fluorescent colour.
The blue arrow sign is particularity interesting as there is a light inside it, in order to make it visible. The deep blue and softly lit white this creates feels quite commanding and radiant. Despite the fact its functionality is so it can be seen in darkness, subjectivity it creates something quite beautiful.
Something intriguing was the small green arrow that pointed downwards by the drain. It was fairly ambiguous and strange. It felt almost fantasy-like in how it was so small and pointed to the ground, obviously it had a purpose but the sign can also be perceived subjectively. It would be interesting to create a wayfinding system for a fantasy scenario (e.g. signs for gnomes that run around drains.)


Study Task 1- Wayfinding Research Video

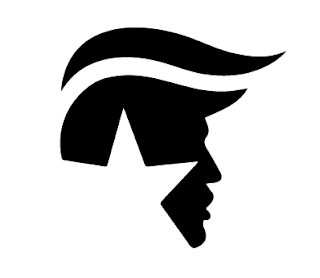
With our first wayfinding diversion we were trying to provoke angry reactions from the public. We wanted to test the response to Trump's controversial campaign symbol, in order to see if a symbol (without words) can drive people to change their ordinary routine. 
However, for the composition of the sign, we printing many Trump logos and arranged them around a pre-existing element of the cafeteria (~due to research.) This worked effectively in communicating a political statement, as the logos highlighted the word enemy behind it, but this wasn't what we set out to achieve. People responded to it like it was art to understand and respect, not like it was a sign to react to. The destructive behavior we did catch on camera was choreographed, so we could show what we were hoping to achieve. However, I don't think this reflects the raw research we were asked to produce.
One interesting response we did have was that one person photographed the logos and put it on Instagram. This shows that people did change their routine in order to comprehend what the sign meant and were furthering the response on a wider scale.

Video Link: https://www.youtube.com/watch?v=Imi9jrfdkSg


Adrian Frutiger Research:

In Frutiger's Signs and Symbols: Their Design Meaning I researched one of his theories about the combining of signs, he suggests the graphical aspects can create a 'mental, philosophical, or "alchemical" impression.' Especially when certain symbols or elements are combined which can create a symbolic expression or language of its own through 'juxtaposition and combination.' This is why we decided to develop a sign that incorporated a pre-exisiting sign within the background- so the two elements could create an entirely different meaning.
Frutiger also places great importance on the use of duality, maybe this could have been more successful if we had presented the Hilary Clinton logo and placed them side by side. People then might be forced to show which they favoured. Other groups split paths and labeled doors- we could have applied this to political stance. So that most people would be likely to take the door labelled with Hilary's logo.

David Rudnick Piece inspiration:


After doing some research, I found a piece by David Rudnick that I thought related to our signs and the background design already on the wall. This piece works because each of the symbols are simplistic, dark shapes on a background with only one strip of colour. Perhaps our symbols would have worked with more impact if they had been bolder, to transcend the type written behind it. We could redo the Trump logo to just be black, to see if just the shapes (without any colour) could provoke a more direct reaction.

David Rudnick

Trump 2016 campaign logo

Tuesday 13 December 2016

Study Task 1- Wayfinding Research

Task: To create a video that documents a direct experience with how supergraphics and wayfinding signs can effect experiences in public spaces.

Idea 1: See-through signs that can be placed over or on faces to make sense, for example: the eye is highlighted into an arrow shape. This could be done with acetate or even something like tracing paper.

Idea 2: To make a wayfinding system or statement that will cause people to align themselves politically. Could communicate a difference in path for right wing and left wing people. Could also create a radical statement and see if people react towards it with their own political views. E.g. a pro Trump symbol.

Among other ideas we decided the second idea would be the best one to develop, it seemed like it would have the most powerful effect for simplistic bold symbols.

Wednesday 23 November 2016

Jo Blaker

Jo Baker is an artist and illustrator who has a wide range of experimental sketchbook work. The work explores colour and form in a relaxed and open style. They often show fast progression and are a documentation of a passion for life. She now works in galleries and teaches children about creativity. Some of her advice:
  • Don't define your practice by a label.
  • Can use past work to come together in a current composition. 
  • Shouldn't overthink ideas without working them through, visually exploring can create far more varied work. 
  • If stuck trying it with a new material can really help, its all about playing with the work.
  • Nature writing is one of her biggest inspirations, especially books like Wildwood by Rodger Durkin which show a human connection with nature.
  • Don't need to have a narrative and a pace in a sketchbook they are purely to generate ideas.
I need to make sure in future I can be free with my sketchbook work, and explore things thoroughly. I may even experiment with doing a sketch a day.

I liked these pieces of work as they show whimsy and honesty, some of them capture moments almost like a story would. 


Sunday 13 November 2016

Personal Evaluation

Personal Evaluation:

From doing these studio tasks I have learnt how much of an impact and influence typography has had on design. I have studied terminology, the characteristics of type and how there are common styles of type for different brands and genres.

I have particularly worked on my skills in kerning. Kerning can indicate the class, budget and trustworthiness of a company- which I will consider when branding in the future. I have realised that every arrangement of letters for a word is individual and it is important that they fit together in order to flow. My INEX design worked well because I experimented with the kerning between the E and the X and was able to understand how they were related to each other.

I have also formulated some skills in letterpress; after our tutorial I experimented with the Italic Caslon typeface. It was interesting to learn new letter type terminology and printing techniques in this process. It also means that in the future I can introduce vintage letter print into my work. I have also improved my skills in Indesign and to an extent, blogger. These skills will help me to present my work to the best possible outcome. Additionally, the tutorials in illustrator have lead me to learn new components and shortcuts I was unaware of- inspiring new ideas and aiding my future design.

From both of my overcomplicated design outcomes I have realised I need to appreciate the merit in having a simple and minimalist final piece. After the second project I realised that my specimen wasn’t tailored enough to the type I was presenting. I added many layers of the type, altering angles, stroke width, size and opacity; overall creating a lot of extra detail for a type that was already complicated enough on its own. Similarly, with my logotype I pushed forward a bold design with an unnecessary circular backdrop which detracted emphasis from the main design. I hope that in future I will be better at creating work with a lot of consideration, not necessarily a lot of content.

Crits have really helped me engage with the class and gain a full, unbiased perspective of my work. I have found that by looking at other people's designs I have broadened my mind to new ideas and possibilities. Being in a room filled with young designers I have found it inspiring and motivating. From discussion I have also picked up new terminology, become aware of important designers and even noticed current design trends. Feedback has also really helped shape my work and I value it well. Additionally, I have become better at articulating how I feel about other people's designs and my justification for it.

Overall, this project has given me a better awareness of type design and how it can be used in future work to compliment and define a piece.

Final Crit for Clandestine and Evaluation

Successes:
  • Only using the outline of Caslon made it more legible, classic and sophisticated.
  • It works far better as a display font.
  • It's not too creepy or forced, unlike fonts like Chiller.
  • Caslon was a good choice as it adds a vintage elegant feeling to the pictorial type. 
  • Design is quirky and not tacky.
Improvements:
  • The type specimen is too cluttered.
  • Could have gone further with the human elements, too subtle?
  • Designs with veins feel out of place, there should have been more experimentation and development here.
  • Doesn't work small scale, has to be fairly large for the detail to be noticeable.                                    
Evaluation:

There are some elements of my typeface which needed more development, like the letterforms involving veins. These feel out of place within the typeface and should have been developed further. I did consider that perhaps all the letterforms should have involved fingers within their form, however I think this would have ruined the subtlety of the type. The simpler letters balance the more complicated ones, so the complicated ones can stand out. I had feedback that said the type wasn’t too over the top and was creepy to a good level, unlike other horror fonts like Chiller.

Part of my rationale for this typeface was to be used for classic vintage horrors, the feedback was that the use of thin outline created a sophisticated and classic feeling perfect for this. However because of the type’s detail it wouldn’t work well at a small scale. In fact people reiterated that it would be better on simple backgrounds because of its detail; within my type specimen it was too cluttered to stand out.

Putting the design into context

I put the type into context on a cover for Dracula and by just using the simple white line on a black background, it has showcased the type far better than my specimen. It appears far more sinister and elegant without such hectic embellishment. The typeface is so pictorial I have also included it as the main design of the cover which has added to the mysterious style and helps present the typeface further.

Type Specimen for the Typeface Clandestine

To present my 'Clandestine' typeface I used a combination of black, white and deep purple tones. I added many overlapping layers of the type, altering angles, stroke width, size and opacity. This overall created quite a complicated effect, communicating a sense of mystery and concealment. However it was perhaps a mistake to add such a lot of extra detail, as the type is already complex on its own. They would have stood out more on a simpler background, similar to the Maja type specimen I looked at.
I experimented with different folds in order to find one that communicated the type. I thought having one that involved a fold like a letter would work well for the clandestine feeling. 

From viewing other people’s type specimens in the class crit I realised that the most successful were the ones that used minimalist designs. With my own I tried to fill an A3 page, whereas if other people had plenty of alterations they wanted to present – they created a book to reveal the type gradually. In future I hope to think more originally about how I can present my work and which ways will best compliment the design. With consideration perhaps I could have made my type specimen more like a letter, being held within an elegant envelope.


Type Specimen from Fontsmith

http://www.typetoken.net/wp-content/uploads/2013/09/FS_Maja2.gifTo present my typeface I looked at type specimens, like this one by Fontsmith called Maja. It's been presented in a unfolded poster format and uses a simple style. They often use overlaid font like this, in a variety of sizes, colour and format. I particularity like the use of shape in this one, the arrow gives it direction and the colons and Xs add detail but don't over complicate it. The three colours are bright and complimentary, for my own type specimen I hope to use a maximum of three colours as well. The main purpose of a type is to be understandable and functional, the viewer doesn't want to be bombarded by the type, but instead allowed to make up their own opinion about it.

Image References


I used these images in reference to my typeface. I wanted to play attention to the finer details of the hand and not just recreate the obvious elements. For example, I looked at the skin between fingers and the form of knuckle.